Eventify QR code generator for seamless event management
Bridge the gap between physical events and digital convenience with QR codes that connect attendees instantly to Eventify features.
Connecting Eventify events with QR code technology
Event coordinators used to hand out printed programs and spend valuable time explaining venue layouts to confused attendees. Now a single QR code scan connects people directly to their Eventify event dashboard, complete with schedules, maps, and real-time updates. This approach follows the same principles outlined in our guide on how to create event QR codes.
An Eventify QR code can link directly to your event's page on the Eventify platform, giving attendees instant access to everything they need. Whether it's a conference agenda, networking opportunities, or venue information, scanning the code eliminates the friction between arriving at your event and finding relevant details.
In this guide I will cover how to create QR codes that connect to your Eventify events, from initial setup to placement strategies that maximize engagement. I'll also share specific tips for event QR codes that work particularly well with Eventify's features. So let's get the party started!
Practical applications for Eventify QR codes
Eventify QR codes work best when they solve specific attendee pain points. The most successful implementations connect people to information exactly when they need it. Consider how check-in QR codes can complement your Eventify setup for a complete digital experience.
Conference registration and check-in
Place QR codes on name badges or entrance displays to let attendees access their personalized Eventify dashboard and confirm their session selections. For physical materials, consider learning about creating QR code stickers for durable badge applications.
Workshop and breakout session access
Print QR codes on room signage so participants can quickly view session details, speaker bios, and materials without searching through the app.
Networking event connections
Include QR codes on table tents or welcome materials to help attendees find networking opportunities and connect with other participants through Eventify.
Trade show booth interactions
Display QR codes at exhibition booths to let visitors access detailed company information, schedule follow-up meetings, or download resources directly through Eventify. Many exhibitors also integrate QR code business cards alongside their Eventify booth codes for comprehensive networking.
Building your Eventify QR code
Creating an Eventify QR code takes just a few minutes once you have your event URL ready. The key is making sure you're linking to the right page within your Eventify event structure.
Locate your Eventify event URL
Open your Eventify event dashboard and copy the direct URL to your event page. This should be the main landing page that attendees see when they access your event. Then visit qrcodeveloper.com to start creating your QR code.
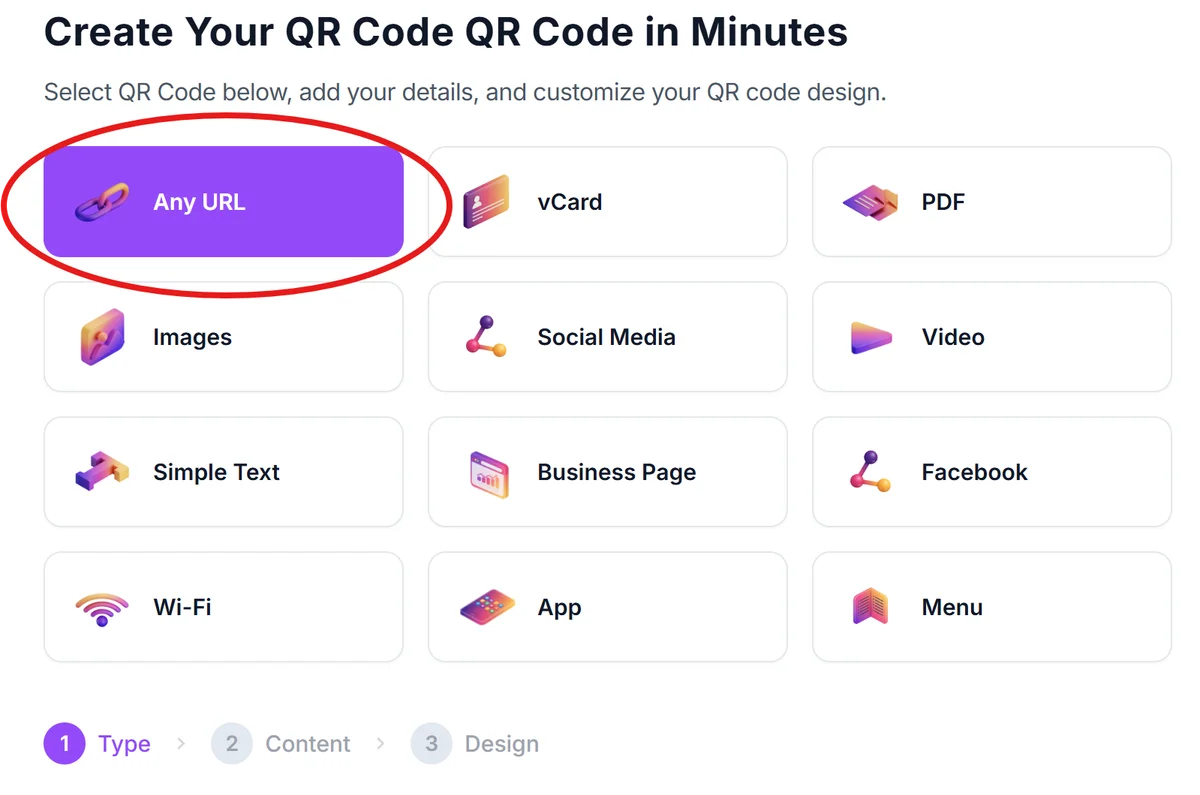
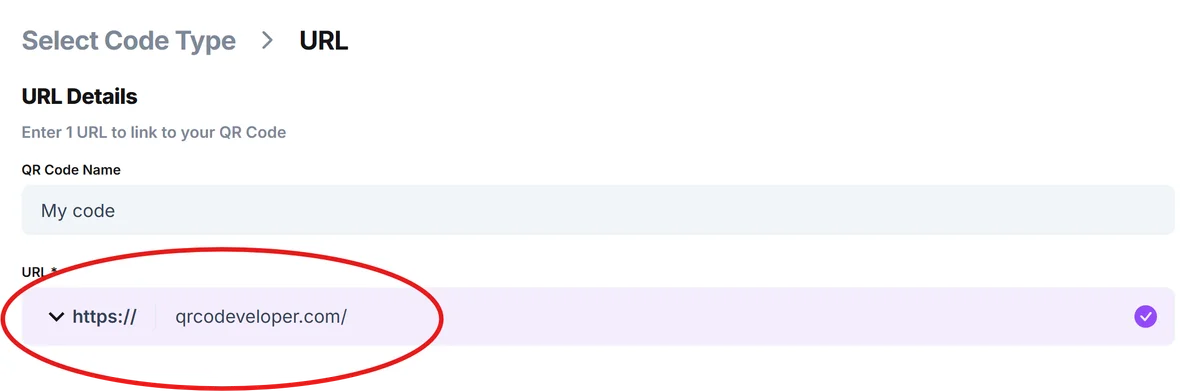
Enter your Eventify link
Paste your complete Eventify event URL into the generator. Make sure it includes any necessary parameters or tracking codes that Eventify provides for attendee analytics.
Brand your QR code design
Click on the pencil icon in the Preview window to further customize your code. Customize the QR code colors to match your event branding. Consider using your event's primary colors or adding your logo to make the code instantly recognizable to attendees. For more detailed customization options, check out our QR code design tips.

Test across different devices
Scan your QR code with both iOS and Android devices to ensure it opens correctly in mobile browsers and doesn't require the Eventify app to be pre-installed.
Generate multiple formats
Download your QR code in both high-resolution PNG for print materials and SVG format for digital displays that might be resized.
Maximizing scan rates and attendee engagement
The placement and presentation of your Eventify QR codes can make the difference between a helpful tool and something attendees ignore. Here's what I've learned works best for event environments.
Position QR codes at natural decision points like registration desks, session room entrances, and networking areas where attendees are already pausing to orient themselves
Include clear instructions like 'Scan for your event schedule' or 'Access networking opportunities' so people understand the immediate value of scanning. This is especially important since many attendees may be unfamiliar with understanding QR codes and their capabilities.
Create separate QR codes for different sections of your Eventify event - one for the main schedule, another for networking, and a third for exhibitor information to track which features attendees use most
Test your QR codes in the actual lighting conditions of your venue, especially for outdoor events or dimly lit conference rooms where phone cameras might struggle to focus properly
Frequently Asked Questions
Do attendees need the Eventify app installed to scan my QR code?
No, QR codes link directly to your Eventify event page through a web browser. Attendees can access all the information without downloading the app, though having it installed may provide a better experience.
Can I track how many people scan my Eventify QR code?
Basic QR code generators provide limited analytics. For detailed tracking, consider using dynamic QR codes that show scan counts, locations, and device types while still linking to your Eventify event.
Should I create one QR code for my entire event or multiple codes for different sections?
Multiple QR codes work better for complex events. Create specific codes for registration, sessions, networking, and exhibitors so attendees get exactly what they need without navigating through your entire event structure.
What size should I print my Eventify QR codes for optimal scanning?
Print QR codes at least 1 inch (2.5 cm) square for close-up scanning on materials like badges, and 3-4 inches (7-10 cm) for signage that people will scan from a few feet away.
Can I update where my QR code leads after printing materials?
Only if you use dynamic QR codes. Static QR codes permanently link to the URL you specify during creation. Plan your Eventify page structure before printing to avoid directing attendees to outdated information.
Related Guides
Ready to create your QR code?
Generate custom QR codes in seconds - free and easy to use.
Create Free QR Code →